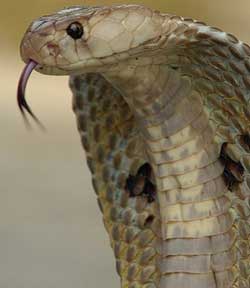
This five-stage multi-cache takes you on a one-hour Hogwarts
adventure to four neighbouring geocaches (and four smiley
faces).

Photo by
Kamalnv
Have you ever wondered what it would be like to visit Hogwarts
School of Witchcraft and Wizardry? Well, here's your chance to find
out.
Use your cunning, apply magic, and display courage as you gather
information from four Hogwarts Series caches that will transport
you to your final destination: Slytherin House!
The posted coordinates take you to Stage One of this
multi-cache. There's no need to cross any fences. Look for a small
box containing a smaller can. Written inside the can's lid is the
northerly coordinate for Slytherin's Portkey.
Of course, you'll need to use magic to open the box. If you have
the right wand, then it will open easily. Check the multiple hints,
below, if necessary. Please don't force the box open.
And since it's a Slytherin cache, you'll probably find a serpent
hiding in the can. Cast a Bewitched Sleeping Spell before you
unscrew the lid. After attempting the spell, shake the can gently.
If you still hear rattling, be prepared to do battle with the
snake. Have your wand ready, and hold the can away from you when
you open it.
The puzzle cache (O.W.L. Exams) has the Slytherin Portkey's
westerly coordinate. Combined with the northerly coordinate, you
now have the portkey's location. You can confirm that location
here. There's a trail just north of the road.
This portkey looks like a tall, branchless tree. Touching it
should transport you to Slytherin House. If you haven't traveled by
portkey before, then expect to feel something like a hook grabbing
your bellybutton and yanking you towards your destination.

Four
Cache Icons
CCARW10
As you probably know, portkeys aren't always reliable. If this
one doesn't work, then you'll have to walk to Slytherin House.
Information inside the traditional cache (Invisibility Cloak 2) will tell you how far to
go and in which direction. (Fancy projection calculations really
aren't necessary.)
Once you arrive at Slytherin, you'll need the padlock
combination to enter. Hopefully, you wrote down these numbers when
you visited the letterbox cache (Owl Post). You'll also have to figure out how
to remove the opened lock from its snug location.
You only need to park twice to find all five stages of this
multi-cache. At the first parking spot, we suggest you visit
Invisibility Cloak 2, Owl Post, and Slytherin's Stage One in that
order. While parked near the O.W.L. Exams cache, you also can walk
to Slytherin's Final Stage.
This series was inspired by Hogwarts House Challenge (GC1ZRV6). Many thanks
to Ms. CanadianRockies for the fine paint job.
Congratulations to Team "Original 'Stache" (kophykupp,
peanutbutterbreadandjam, Cdn Kitn, and missbug) for the shared FTF
honours.