Trig-a-gnome-a-tree
A multi-cache with a twist
This multi-cache has 4 interim way points, with the final being located at a fifth point. It involves quite a lot of walking over a mixture of level roads and some fairly steep 4WD tracks, but can be cycled on a mountain bike if desired. I haven’t cycled the route (it is way too steep for me in some places), but if you are walking, it should take you around 2 hours to complete the course plus the field puzzle in the middle and you will cover 8.5 kms if you follow the recommended tracks (see below).
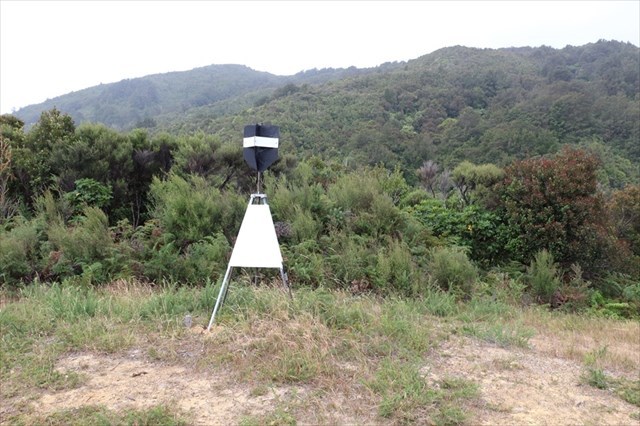
The trig station at WP1
What you have to do at each waypoint
WP1: Search here to find a micro-sized object that has the co-ordinates of WP2 written on it.
WP2: This waypoint is the second from the end fence post next to a white gateway. From this point you will be able to see a similar white gateway less than 100m away: the end fence post next to that gateway is WP3. Walk to that post and mark its position as WP3 in your GPSr.
WP3: Once you have both WP2 and WP3 recorded in your GPSr it should tell you the distance between them. If not you need to be able to measure the distance some other way, because this is side x in your triangle and you need to know the value of x for the calculation.
Standing at WP3 the bearing to WP4 is 123° True. The angle y that you need to use in your calculation is the difference between this and what your compass tells you is the true bearing back to WP2. Be careful with this: a large discrepancy in measuring that bearing will give you an overly large error in calculating the distance to WP4.
WP2, WP3 and WP4 form a right angle triangle, as per the diagram below.

Use the scientific calculator that you brought with you to calculate the distance z that you need to travel along the stated bearing to get to WP4. Some GPS receivers can do a good job of projecting a waypoint knowing a bearing and a distance, some can't.
WP4: Whatever method you decide on to pinpoint WP4 given the information provided and the maths lesson below, search for an object that has the co-ordinates of the final location of the cache written on it. If you have done the calculation and projection correctly you should be within a couple of metres of WP4. However, this depends on the accuracy of the compass you used to give you the bearing back from WP3 to WP2 as well as the accuracy of where your GPSr thinks WP3 actually is. Though we probably all love our GPSr devices dearly (how could we go Geocaching without them?) they are not precision instruments, but you shouldn't have much difficulty finding the required object anyway.
The track to WP1
Park at the designated parking spot and after going through the underpass under SH2, turn right and follow the Pylon Loop Track. WP1 is at the end of the track, a few hundred metres beyond the second track signpost.
The track to WP2
Retrace your steps from WP1 a little way and follow the track signpost for the Pylon Loop Track downhill. At the end of the track there is a locked gate with a foot passage to the side. WP2 is some distance beyond this gate.
The track to WP3 and WP4
You will be walking across a mixture of grass and road surface whilst doing the field puzzle.
The track to the Final
Retrace your steps back past the locked gate at the bottom of the Pylon Loop Track and uphill until you reach the sign for the Kaitoke Hill Track, where you turn right. This cuts around 1 km off the return trip, but is quite a bit steeper in places than the Pylon Loop Track and can be slippery at all times as a result. This returns you to the underpass back to your car. Don't be fooled into following what appears to be the 'main highway' past the intersection part way long this track: it goes to a dead end. Just follow the track signpost uphill on the rough track from that point. This section of the track is more challenging to your fitness.
The final is located a few hundred metres from the car, so once you have found it you won’t have much farther to walk.
The terrain rating of this cache reflects the hardest part of the journey at the final. The route ranges between terrain 1 and terrain 3 over most of its course.
The tools you need to solve the field puzzle
Make sure you have these things with you before you set off to find WP1.
- A compass (GPS compass may be OK, but make sure it is calibrated properly)
- A scientific calculator
- A device to measure the distance between WP2 and WP3 (a decent GPSr ought to do this OK)
- Also make sure you take care and pay attention to exactly what it says in the waypoint instructions above.
The Cache
The container is not exactly your normal cache container as it has a camo’d guardian that is an integral part of the lid. The container is 2 litres in volume and can take quite large travel bugs and trade items. When placed it contained a log book, a pen and some trade items:
- a plastic gnome
- an old wind-up stopwatch
- a DVD movie - "The Incredibles" (rated PG)
If you want to trade please trade equal in value or trade up, as per the Geocaching guidelines for the game. Found logs online that are not also in the written log will be removed unless you provide other evidence that you really did find the cache.
When replacing the cache after signing the log please remember to replace it exactly how you found it so you don't spoil things for the next person.
Please do not post any photos with your log of either the cache location or container, or anywhere around the vicinity of WP2, WP3 and WP4. I'd hate to have anyone taking a shortcut to get to the cache without doing the hard work themselves  .
.
The maths that you require to find WP4
Trigonometry
The word ‘trigonometry’ means ‘triangle measurement’.
Trigonometry is an important tool for evaluating measurements of height and distance. It plays an important role in surveying, navigation, engineering, astronomy and many other branches of physical science.
Trigonometry involves the ratios of the sides of right angle triangles. The three ratios are called tangent, sine and cosine.
In the following triangle PQR,
- the side PQ, which is opposite to the right angle PRQ is called the hypotenuse. (The hypotenuse is the longest side of the right angle triangle.)
- the side RQ is called the adjacent side of angle θ .
- the side PR is called the opposite side of angle θ .

Trigonometric Functions
The sine of an angle is the ratio of the opposite side to the hypotenuse side.
- sine = opposite side divided by hypotenuse side
Sine is usually abbreviated as sin.
The cosine of an angle is the ratio of the adjacent side and hypotenuse side.
- cosine = adjacent side divided by hypotenuse side
Cosine is usually abbreviated as cos.
The tangent of an angle is the ratio of the opposite side and adjacent side.
- tangent = opposite side divided by adjacent side
Tangent is usually abbreviated as tan.
A common mnemonic to remember all three trigonometric functions is “the Native American Chief SOH-CAH-TOA”.
Examples:
Calculate the values of sin θ, cos θ and tan θ in the following triangle.

Solutions:
Sin θ = opposite / hypotenuse
= 5/13
= 0.3846
Cos θ = adjacent / hypotenuse
= 12/13
= 0.9231
Tan θ = opposite / adjacent
= 5/12
= 0.4167
Evaluating Trigonometry using a Calculator
To find the trigonometric value of an angle you can make use of a scientific calculator. When I learnt basic trigonometry at school pocket calculators hadn’t yet been invented, so we used a set of log tables or, if we were lucky, a slide rule. Nowadays we can just whip out a smart phone, so long as it has a scientific calculator app installed on it. As such calculators can operate a little differently I have not provided an example of how you would use one: you need to experiment with your own calculator, using the example below, to get the same answer to make sure you can do this. Note that the trigonometric function you have to use to solve the field puzzle is NOT the same as the one in this example: I didn't want to make it TOO easy for you .
Example:
Find the value of x for the following triangle.

Solution:
sin 31.3° = x / 6.21
x = 6.21 × sin 31.3˚ = 3.2262
Here endeth the lesson.