_________________________________________________________
After a short rest in Rivendell, and some illuminating advice from Elrond (which you will find out more about at cache #10 in this series), you and the company of dwarves set off to cross the treacherous passes of the Misty Mountains on your way to the Lonely Mountain, where the dragon Smaug awaits.
While sheltering in a cave in the mountains, you and the dwarves are captured by the goblins that inhabit these parts.
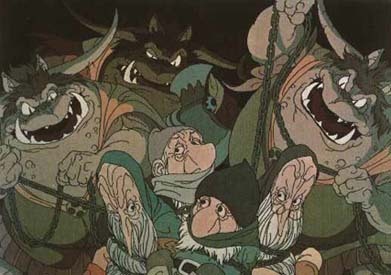
Down, down, down into the belly of the mountain they carry you, into utter pitch darkness. At the bottom a faint red glow awaits, along with the sound of an army of goblins. They bring you into the dimly lit hall and you behold the Goblin King, who questions you about your business in the mountains.

Before you are able to answer, there is a great flash followed by complete darkness as all the lights go out. In the confusion that follows, you and the dwarves are hurried out of the great hall and into the dark passages by a whispering voice that you recognize as Gandalf's. During the escape you become separated from the rest of the company and find yourself utterly alone, and in complete darkness.
While stumbling through the passages trying to find a way out, you happen to step in a puddle of water, and soon find out that you are at the edge of an underground lake. While feeling around in the dark, you just happen to put your hand on a small metal ring lying on the floor, and remembering that your sword glows blue when goblins are around, you take it out to examine the ring in hopes of finding a clue to the way out.
Your thoughts are interrupted, however, by a light splish-splashing in the lake, and you see two faint glowing orbs approaching. The creature gollum slithers up to you, inspecting you to decide whether or not you are good to eat. He sees your sword and is wary of you, so he decides that he will try to trick you with a game of riddles. If he wins, he gets to eat you. If you win, he will show you where his special cache is, and then show you the way out.

Park at the parking coordinates and navigate to the posted coordinates, where you will find a container with several items inside, including the locked final stage and Gollum's ring.
Begin the riddle game by examining the ring with your "sword". The One Ring, as we find out later, has writing on it that can only be seen by fire, however what Gandalf did not know is that the ring also has writing on it that can only be seen in the faint blue glow of your sword. This is Gollum's first riddle.
Along the way, you will find several containers holding riddles that Gollum has laid out for you. There are 4 containers total, counting the Stage 1/Final as one container. At various stages you will also find 3 different numbers that you will need to access Gollum's special cache. The answer to each riddle is a clue to the next container that you will find. You do not need to solve each riddle to find the next container, but if you do know the answer, you will know what to look for.
At the posted coordinates for stage 1, you will find 3 white reflectors marking the location of the Stage 1/Final container. After you have inspected the contents of that container, you will need to follow the reflective path markers that Gollum has laid out for you using your flashlight (yes, Bilbo had a flashlight too, but Tolkien just neglected to mention that part in his story). When you see 3 white markers together, look low near them for the next container. Be careful not to skip over any containers! If the container you find does not match the riddle from the previous stage, you may have missed one. The stage 4 container will not have a riddle, but will reveal the final number you need to access Gollum's cache and escape.
There is one tricky spot along the path. At stage 3 the white reflector path changes directions and turns almost completely around to retrace your steps, so at stage 3 look behind you for the next marker. Stage 4 is marked by 3 white markers with an orange marker in the center. From that point you should follow the orange markers to take you back to the Final stage at the beginning, or you can just navigate there with your GPS. Gollum has placed the markers so that you should be able to see the next one while standing at the previous one, so keep that in mind if you have trouble spotting the next marker. You can also try using just your UV light instead of the flashlight to spot the next marker as that may sometimes help.
Although a UV light is listed as a requirement for the cache, it IS possible to solve the cache without a UV light if you are very observant and use some logic, but you miss out on some of the coolness of the cache. Doing it without a UV light would up the difficulty to about a 4.