Congrats to BoxerBailey on FTF!
This is another in a series of puzzle caches designed to teach new technical geocaching skills.
In today's lesson, you will learn how to store and insert photos into a listing of a geocache that you own. Geocache listings can be much more appealing and interesting if you include pictures.
It's probably easiest to do this "lesson" on a laptop or desktop computer, rather than your phone. There will be a quiz at the end, so pay attention. You do not have to own a geocache or edit a geocache listing to solve this puzzle.
Inserting an image that is already on the internet
Below is an image, the logo of the Association of Nova Scotia Geocaching:

Here is how you can insert this image into a cache listing. For now, assume your image is already on the internet, and you have copied the URL to your image.
- Copy the URL of the image you want to insert. You get this address by viewing the image in a page by itself. One way to view an image on its own page is to right click on the image and select "Open image in new tab". Copy the url from your browser window. In this example, the image URL is http://bit.ly/ANSGLogo
- Edit your cache listing. If you don't have one yet, create the cache listing, and edit it.
- Under the "Description", position the cursor where you want the image to go.
- Click on the "image" icon (a box with mountains inside it). A window will pop up.
- In the popup window, paste the URL of the image into the URL box. You can edit other attributes of the image, such as the "advisory title" which is text that will appear when you hover over it.
- Click "save" in that popup window. Your image should now appear in the "description" you are editing.
- Click "Save & preview" or "Save" at the bottom of the geocache listing to see the finished product.
This method is convenient for images that are already on the internet. For example, someone may have posted a image in their log for your cache, and you really like the picture and want to dress up your listing with it. You can get that image in a window (typically for a cache gallery image, you want the lower resolution version, see GC8BVMP for more on that), copy the URL and then follow the steps above.
How can I put my images online somewhere and then insert them?
In principle you can put your images anywhere on the internet, as long as there's a URL that points to the image. I recommend storing your image on the geocache listing in which you want to display it. This is "tidy", and it also increases the chances that the image will be available for a long time.
Here's how to add an image to a geocache listing:
- Edit the listing
- Look for the title "CACHE IMAGES" near the bottom of the edit screen. Click on "Add images" under this heading, and follow the instructions to upload the image. Give the image a name (helps in the next step) and save your changes.
- Viewing the cache page, scroll down to the bottom. There will be a small icon for the image you just added. Right click on the name of the image beside the image icon, and choose "open link in new window". The image should open in a new window. Alternately you can view the cache gallery and right-click on the image there to open it in a new window. By the way, the west coordinates for this mystery cache are W 064 27.252.
- You should now have the image in a new window of your browser. Copy the image URL of the image. Depending on how you got here, the image file name near the end of the URL may have a suffix that indicates size. It's right before the ".jpg" at the end. The suffixes I know of are as follows:
- "_l" = low resolution
- "_t" = thumbnail
- "_d" = the image you see if you click on someone's log and get to the "View Geocache Log" listing.
- no suffix = original size.
- You now have the URL of your image. Go to the description above and follow steps 1 - 7 to insert that image.
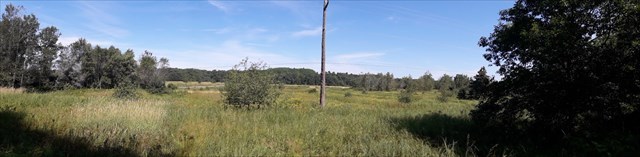
Here is an image which I took near the cache location. I saved it to the cache listing page following the instructions above, and then inserted it.
Another way to do the above is to use the "Post Note" option to log a visit on your own cache, upload an image there, and then grab the URL of the image you loaded. That works fine as well.
If you have any questions about this, I'm happy to try to help. Message me on the geocaching message centre.

This cache owner
supports the
Association of Nova Scotia Geocaching